

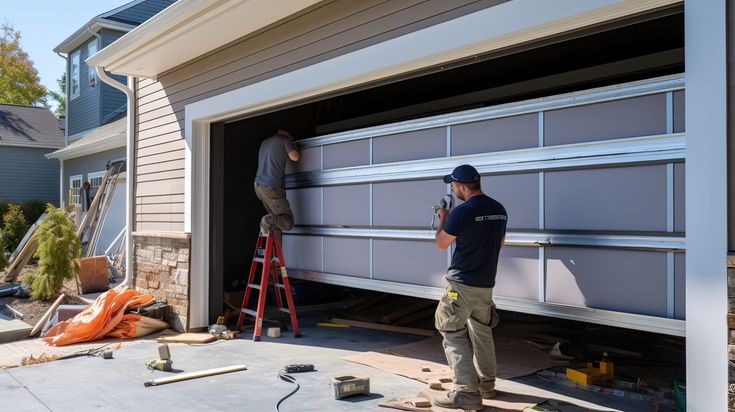
A garage door is one of the largest moving components in any home. Installing one can improve security, boost curb appeal, and increase property value. While professional installation is often recommended, many homeowners with basic DIY skills can successfully install a garage door by following the correct steps and safety precautions. This beginner’s guide walks you through the garage door installation Phoenix AZ process from preparation to final testing.
Why Proper Garage Door Installation Matters
A properly installed garage door ensures smooth operation, enhances home security, and helps prevent costly repairs in the future. Since garage doors can weigh hundreds of pounds, careful installation is essential for both safety and performance. Before starting, read the manufacturer’s instructions for your specific garage door model, as some installation steps may vary.Tools and Materials You’ll Need
Gather all necessary tools and materials before beginning the installation:Tools
- Power drill
- Socket wrench set
- Screwdrivers
- Adjustable wrench
- Hammer
- Tape measure
- Level
- Step ladder
- Locking pliers
- Safety glasses
- Work gloves
Materials
- Garage door kit
- Door panels
- Tracks
- Rollers
- Hinges
- Springs
- Cables
- Brackets
- Fasteners
- Garage door opener (optional)
Step 1: Measure the Garage Opening
Accurate measurements are critical for selecting and installing the correct garage door. Measure:- Width of the opening
- Height of the opening
- Side room on both sides
- Headroom above the opening
- Backroom depth inside the garage
Step 2: Prepare the Garage Opening
Inspect the garage opening for any damage.Check for:
- Rotting wood
- Cracks in masonry
- Loose framing
- Water damage
Step 3: Install the Bottom Panel
Begin with the lowest section of the garage door.Procedure:
- Place the bottom panel in the center of the opening.
- Use a level to ensure it sits evenly.
- Attach weather stripping to the bottom edge if not pre-installed.
- Secure the panel temporarily with nails or clamps.
Step 4: Attach Hinges and Rollers
Install hinges according to the manufacturer’s instructions.Steps:
- Attach hinges to the top edge of the first panel.
- Insert rollers into the roller brackets.
- Ensure all hardware is tightened securely.
Step 5: Install Vertical Tracks
Vertical tracks guide the door as it moves upward and downward.Installation Tips:
- Position tracks on both sides of the door.
- Align tracks with the rollers.
- Use a level to verify proper alignment.
- Secure tracks to the wall framing with brackets.
Step 6: Add Additional Door Panels
Stack each remaining panel on top of the previous one.For each panel:
- Position it carefully.
- Install hinges.
- Insert rollers.
- Connect hinges to the lower section.
Step 7: Install Horizontal Tracks
Horizontal tracks allow the door to travel along the ceiling.Procedure:
- Connect horizontal tracks to the vertical tracks.
- Support the tracks with ladders during installation.
- Attach ceiling brackets.
- Secure tracks to overhead framing.
Step 8: Install the Spring System
The spring system counterbalances the weight of the garage door.Common Spring Types
Extension Springs
Located alongside horizontal tracks.Torsion Springs
Mounted above the garage door opening.Important Safety Warning
Garage door springs are under extreme tension and can cause serious injury if mishandled. If your door uses torsion springs, consider hiring a professional installer for this portion of the project. Follow all manufacturer instructions precisely when installing springs.Step 9: Install Lift Cables
Lift cables work together with the spring system to raise and lower the door.Steps:
- Attach cables to the bottom brackets.
- Route cables according to the manufacturer’s design.
- Ensure cables are seated correctly on drums or pulleys.
Step 10: Tighten Hardware and Check Alignment
Once all major components are installed:Inspect:
- Hinges
- Brackets
- Rollers
- Tracks
- Fasteners
Step 11: Test Door Balance
A balanced garage door operates smoothly and places less strain on the opener.To Test Balance:
- Disconnect the opener if installed.
- Lift the door halfway.
- Release it carefully.
Step 12: Install the Garage Door Opener (Optional)
If using an automatic opener:Basic Installation Steps:
- Mount the opener motor unit.
- Install the rail assembly.
- Attach the trolley.
- Connect the opener arm to the garage door.
- Install safety sensors.
- Wire wall controls.
Step 13: Test Safety Features
Modern garage door systems include important safety mechanisms.Check:
- Auto-reverse function
- Photo-eye sensors
- Emergency release handle
- Manual operation
Common Installation Mistakes to Avoid
Incorrect Measurements
Even small measuring errors can lead to major installation problems.Uneven Tracks
Tracks that are not level can cause jerky movement and excessive wear.Loose Hardware
Loose bolts and brackets can create vibration and noise.Improper Spring Installation
Incorrect spring tension can damage the door and create safety hazards.Skipping Safety Checks
Always test safety systems before regular use.Maintenance Tips After Installation
Proper maintenance extends garage door lifespan.Monthly Tasks
- Inspect cables and springs
- Check roller condition
- Tighten loose hardware
- Test safety sensors
Every Six Months
- Lubricate hinges
- Lubricate rollers
- Lubricate springs
- Clean tracks
When to Call a Professional
Although many homeowners can install a garage door, professional assistance may be necessary if:- Torsion springs are involved
- Structural repairs are required
- The door is unusually large or heavy
- Track alignment issues persist
- Electrical work is needed for the opener
